I thought this would be a good place to talk a little bit about how I clean up my artwork. I work in a variety of materials and each one has its own challenges. Mainly, I like to create dolls either in watercolors or in Adobe Illustrator. And the two methods couldn't be more different! With the watercolors, I often need to do a little post-production work in Photoshop. That's what we'll go over today.
First, you'll need a doll to work with. I'm using a scan of the colored pencil doll I made a few weeks ago. I highly recommend a scan. If you don't have (or don't have access to) a scanner, you can use a digital camera to "scan" your image. It just requires a few extra steps that I'm not going over today. If there's a need, I can certainly come back to that. You'll also need Photoshop or a similar editing program. I also like to use my Wacom tablet, but you can do all of this with a mouse.
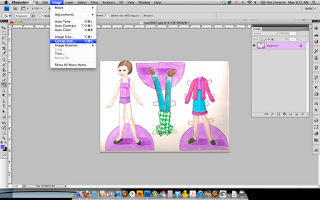
Open your image in Photoshop. Adjust the image rotation if needed. Go to Image>Image Rotation to do this.
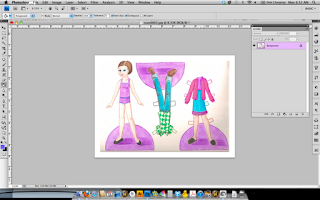
Let's talk a little bit about the unedited image. First, there's some discoloration on the bottom and edges. Second, the head and bases are almost cut off. Third, there are some random mistakes and artifacts that need to be cleaned up.
Start with the broad, general edits and move to the small, detailed ones. In this case, resizing the image is the biggest, easiest change to make.
Go to Image>Canvas Size.
This opens up a resizing panel. This panel tells you the current dimensions of the canvas, has a place to adjust the size, a menu for measurement units (inches, pixels, etc), a visual menu for selecting how space is added (to all sides, just the top, etc), and the color of the new area. We really only need to add to the size. I made my canvas 1 inch bigger all around. Just add a 1 to each slot.
So now I have a new, larger canvas. It's not 8.5 by 11 at the moment. We'll adjust that at the end. Working larger and scaling down is always better than trying to work small and scale up.
Next, I add a layer mask. It's located on the Layers panel at the bottom. It's a rectangle with a circle in it.
A layer mask is a secondary layer added to your current layer. I use a brush with either black or white on the layer mask, but you can use a variety of tools such as gradients. Sections under the black are hidden and things under white are visible.
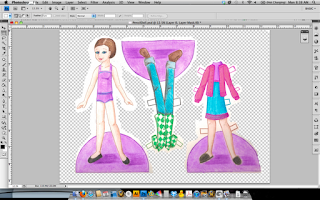
I used the Lasso tool and the Paint bucket to fill in broad sections of the layer mask. Make sure that you're on the layer mask and not the layer itself, or your layer will be black!
Now I go in with a soft brush and get as close to the image lines as I can. If you overpaint somewhere, either paint back over it in white or use the eraser. Nothing is permanent with a mask -- and that is the advantage to using one!
So this is the layer mask at the end. It takes time and it can be tedious, but it's worth the hassle. I have a red background here to better illustrate what the layer mask looks like. Change that layer to white and make any final edits to the doll.
I try not to do too much if I can help it. Part of the appeal of watercolor or pencil is that it's done by hand, with all the imperfections that come with that. I darkened some shadows with the burn tool, and erased some minor scanning artifacts with the close/heal tool, but that was about it.
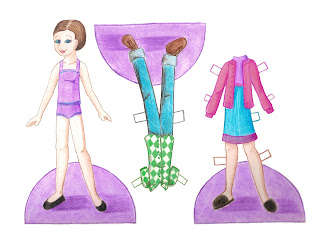
This is the final doll. I went to Image>Image Size and changed the dimensions. I changed one to 11 and the other dimension was linked, so that updated to around 8. I then went to Image> Canvas Size and added the missing half-inch so that my doll was 8.5 by 11 inches.
So that's it for now. I'm hoping to have an intro to Adobe Illustrator up next time. Til then, have fun editing dolls!


No comments:
Post a Comment