Today we'll do a little more with Photoshop. I want to go over using patterns & textures with the doll we were working with last time.
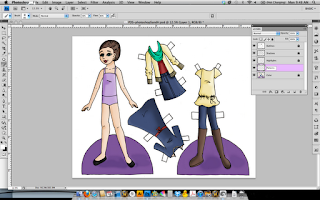
Open your doll in Photoshop. Ideally, you'll have a layered psd file from last time.
Lock all of your previous layers and create a new layer above the Color layer. Call this Patterns (or Textures of something similar). This is where we'll apply the layers and textures. Just a note about layers: I love them! Be sure to name your layers so that they stay organized. I try to do one thing per layer -- it makes fixing mistakes or making changes a lot easier!!
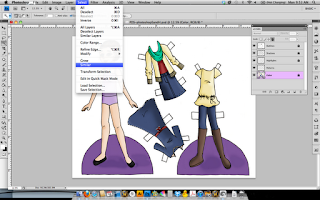
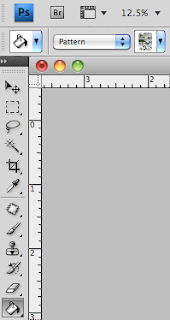
I want to take all of the blue colors and add a jean texture to them. Using the magic wand tool, go to the Colors layer and click on something blue. Since all the blue tones in this image are the same, save a couple of minutes and go to the Select menu. Choose Similar. This selects all the same color. While the blue are selected, click on the Patterns layer. Then choose the paint bucket tool (it's with the gradient tool).
One of the great things about Photoshop is the ability to customize. You can add your own pattern or texture very easily (I may have a whole lesson just on that...). If you decide to look for patterns and textures, make sure your search for seamless ones. I happen to have a seamless jean texture already so I'll use that one. While your blue colors are selected, open the paint bucket tool with patterns selected. Choose the pattern you want and click the paint bucket inside the selected area. Make sure you are on the Patterns layer.
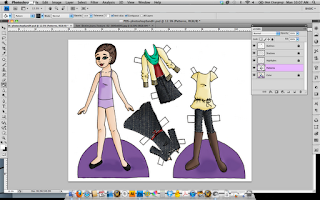
You should have something similar to the image above. All my blue colors have a jean texture over them. The blue is still there on the Colors layer. All of those shadows and highlights we worked on last time are still there, too. Now, with the jean on its own layer, we can play around with transparency, color, etc.
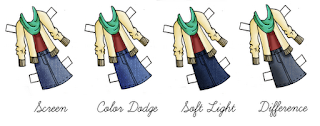
Just by playing around with the layer mode menu, I got four interesting variations. I used screen, color dodge, soft light, and difference.
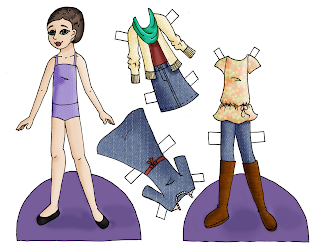
Using the same method as the jean texture, I added a pattern to the shirt and suit, and a texture to the sweater. Make a new layer for each pattern/texture to make life a little easier. Play around with patterns, textures, colors, layer modes, etc. The possibilities in Photoshop are truly endless. And this is by no means a comprehensive understanding of Photoshop. I've really just scratched the surface of what can be done. This doll, for instance, was created using the same techniques I used above.
Next time we'll take a previous paper doll done non-digitally and learn how to clean it up in Photoshop.



No comments:
Post a Comment