
This week, I want to share my method for creating quick, clean line work. It's the technique I used on the December dolls. It's so quick & easy it feels like cheating! There are other techniques, of course, and I've gone over several of them before. This one is really good quick results & ideal for simple drawings.
I used both Photoshop and Illustrator to create my line work. Most of my work is done in Illustrator, it's a program I understand, and it gives me amazingly sharp detail in a way I can't achieve with any other methods. If you don't have access to Illustrator, I strongly recommend Rachel's line work tutorial on Paper Thin Personas. It's a brilliant method and produces really nice results.
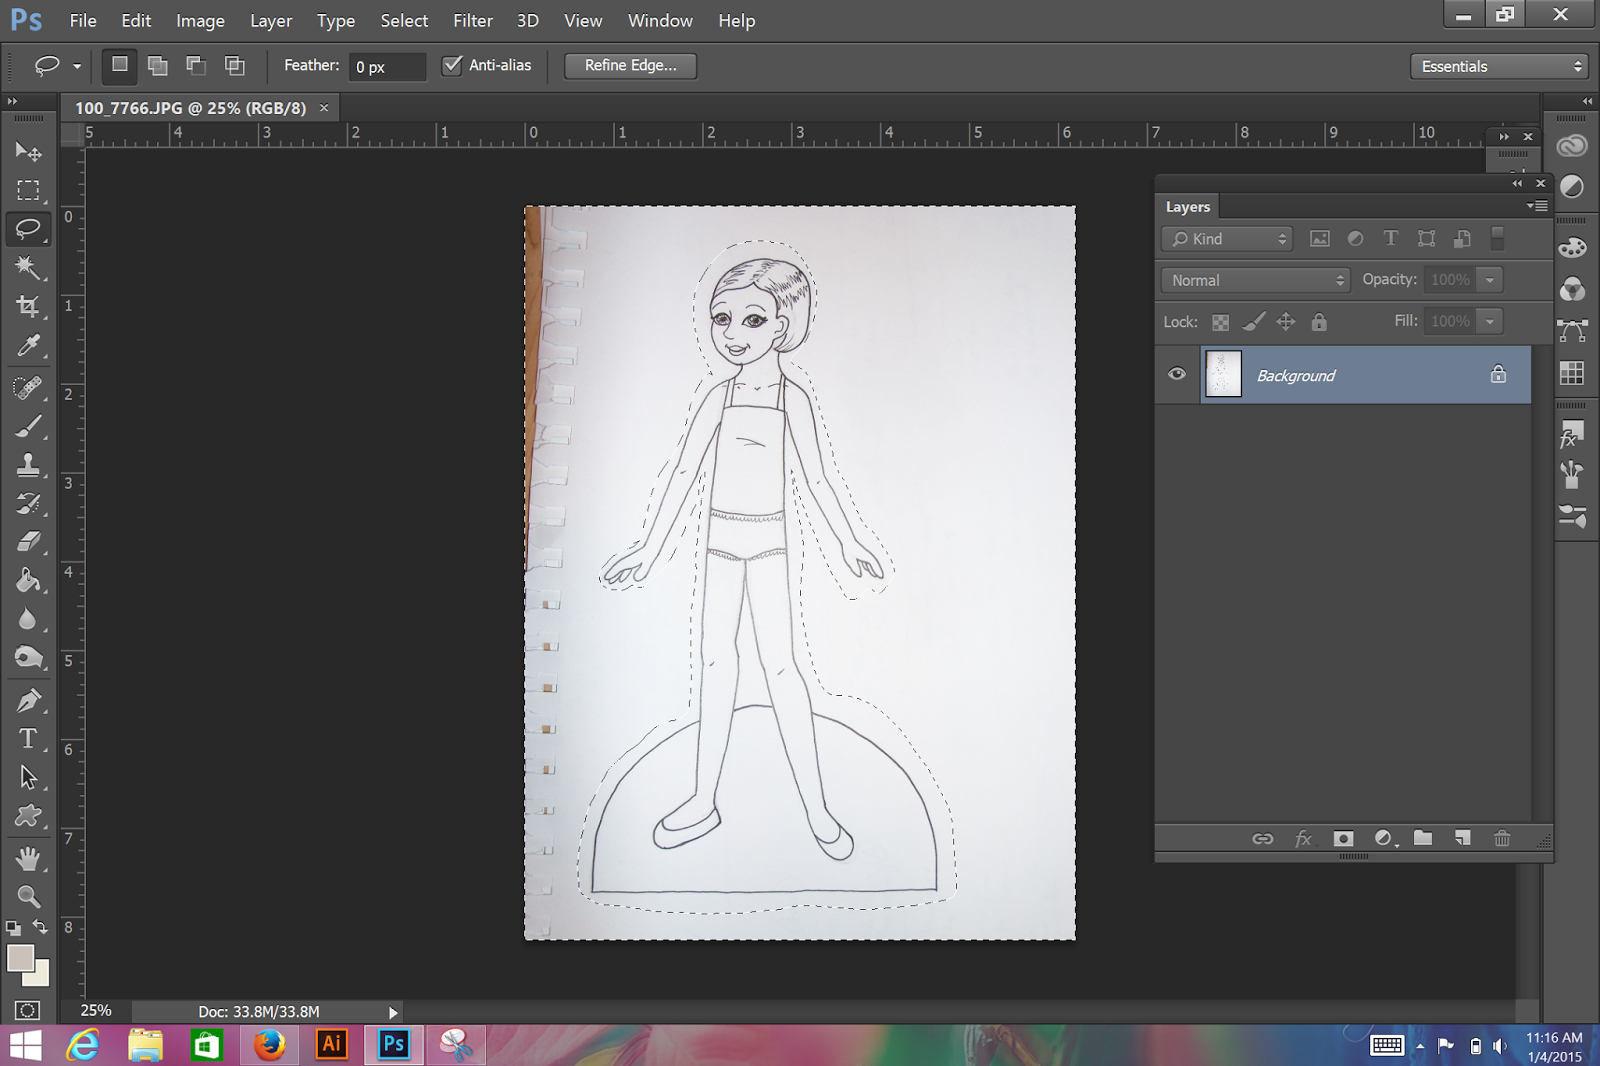
I start with hand-drawn sketches. We'll use the good ol' lesson doll to demonstrate.

I like to clean up my drawing without resizing it. Often, by the time I get to Photoshop I already have a full wardrobe drawn. It would create a lot more work if I resized the doll before cleaning up the outfit sketches as well!
.png)
I used the lasso tool to draw around the doll. Right-click and choose Select Inverse. Then press the Delete (or Backspace) button and a menu will pop up.
.png)
.png)
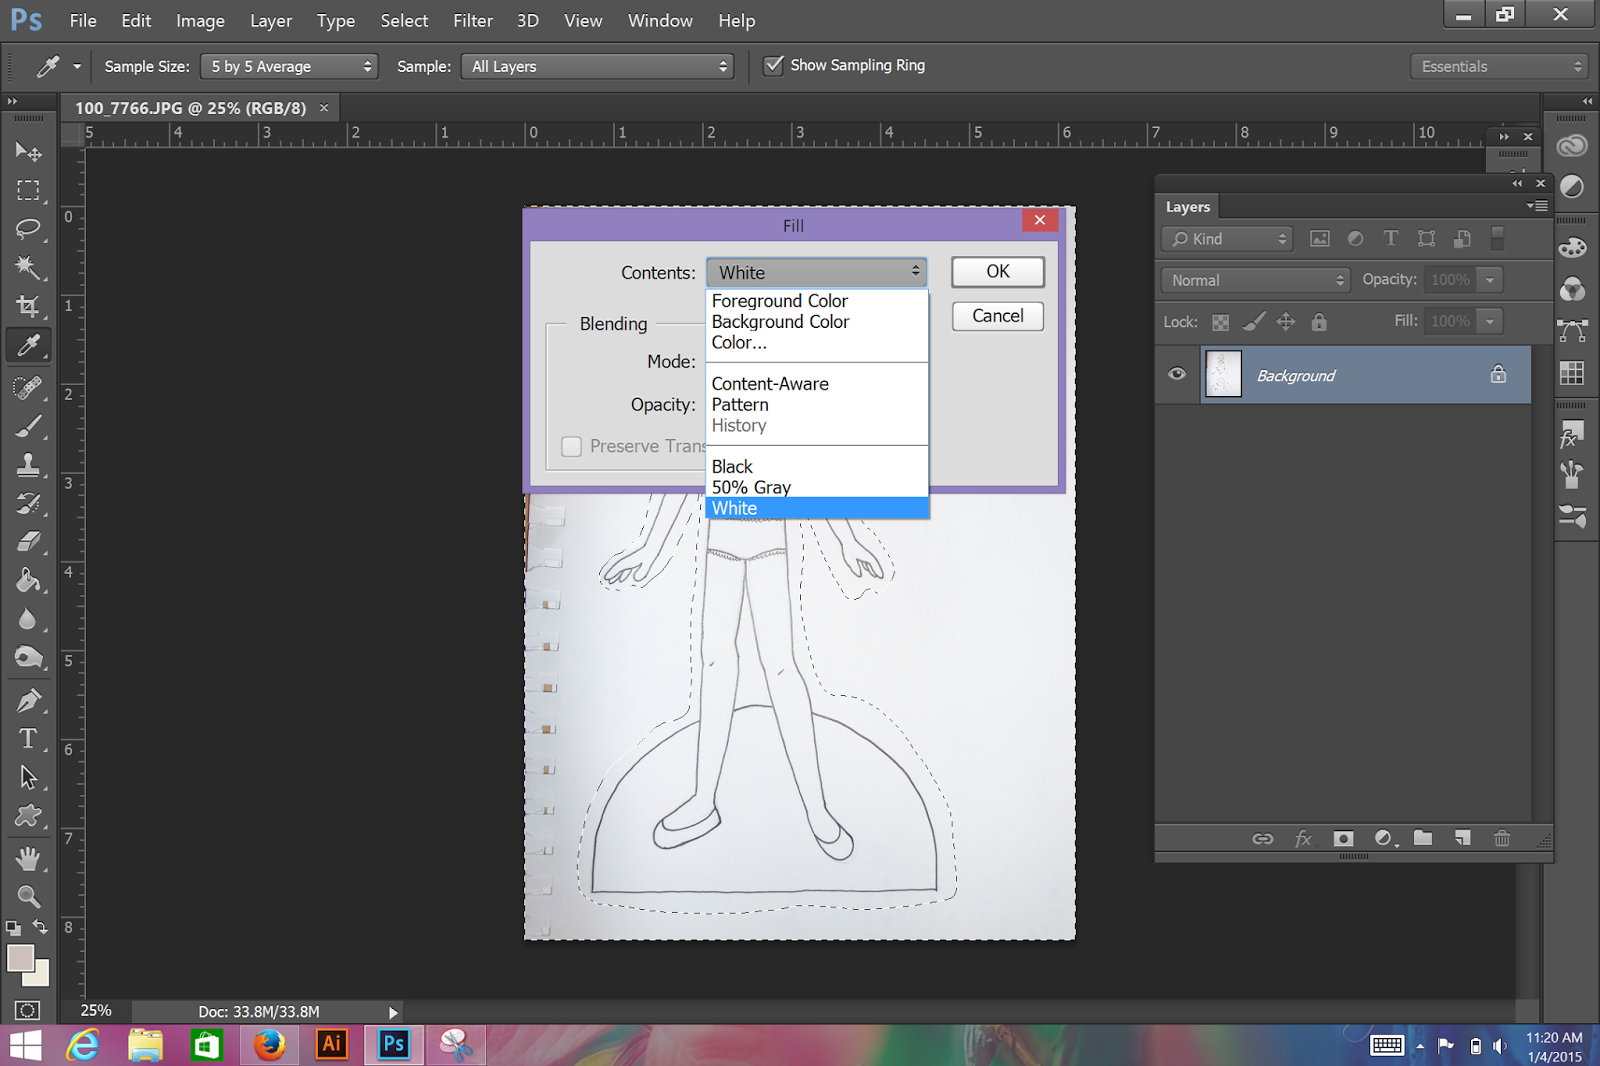
Now that I've erased most of the grey paper color, I can get the line art closer to pure black & white. To do this, go to Image>Adjustments>Levels. Using the white eyedropper (on the far right) select the darkest of the grey color. In this image, it's in the lower left corner. This takes that tone and any similar tones and makes them white. Once my background is white, I use the Dodge tool to darken up any grey tones so that they are dark enough. They don't need to be perfectly black, just black enough to not be white!
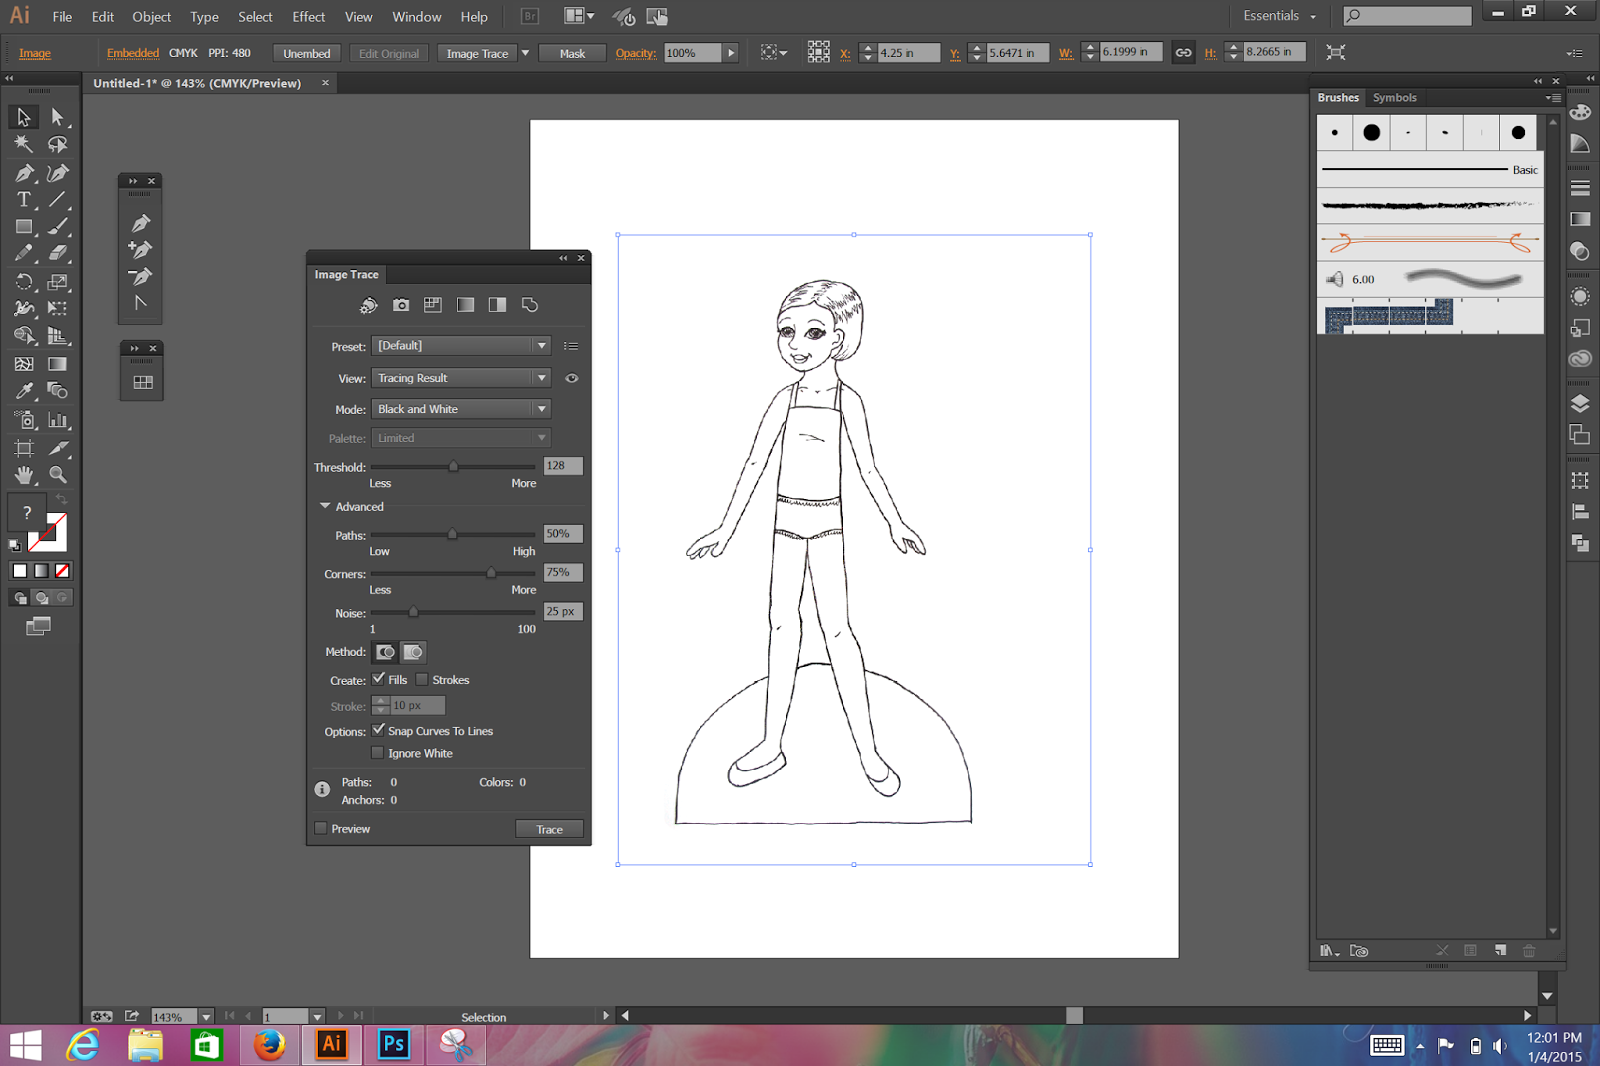
Next up, Illustrator! You can save your current file and open it in Illustrator, or take the lazy route like I do: select & copy your image in Photoshop, open a new file in Illustrator and paste your file there.
We're going to use the auto trace feature in Illustrator. This technique maintains the hand-drawn qualities of a sketch while having the advantages of a vector image. I can scale a vector infinitely but I can't scale a sketch (even a high-res scan) infinitely.
Once you've opened your image in Illustrator, go to Window>Image Trace. This opens the auto trace menu. A word of caution: auto tracing takes some practice and fiddling with settings. It isn't perfect. It will give you smooth, hand-drawn style lines that are great for painting over in Photoshop. It will not give you the perfect, point-by-point smoothness of a carefully crafted vector.
.png)
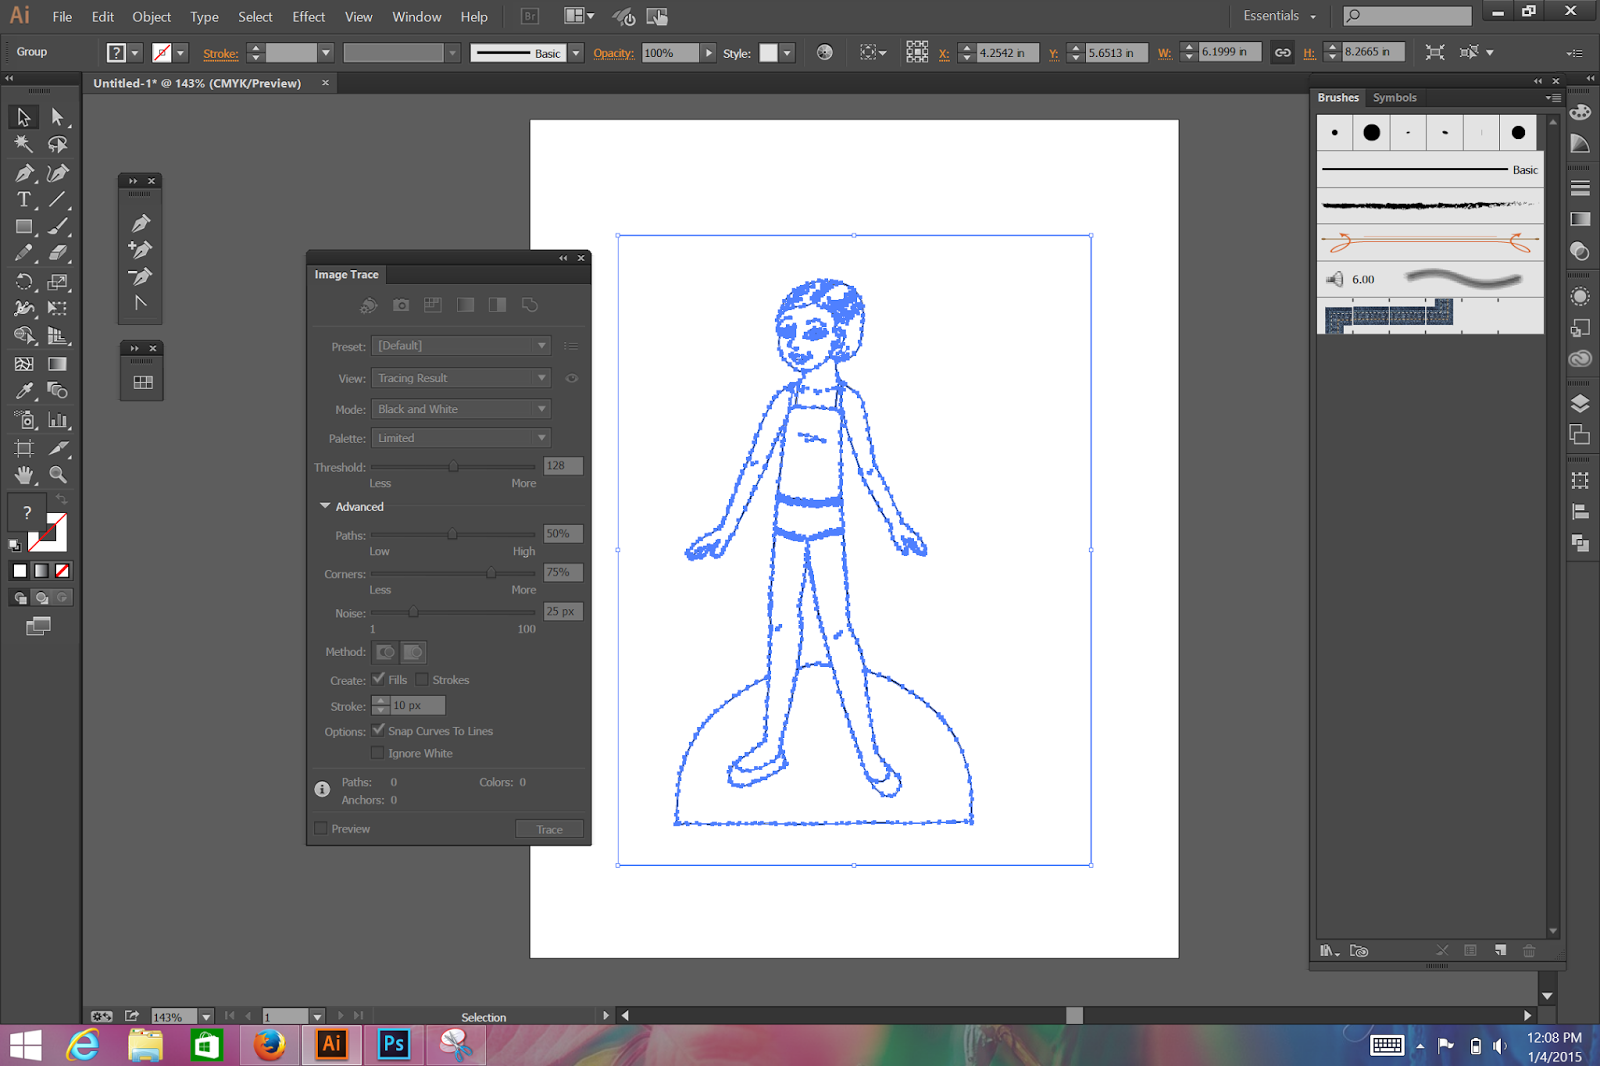
Once you're happy with your image, click on the Expand button in the menu bar.
.png)
All of these blue dots are vector points! This is a sloppy vector (which may be exactly what you need or want) but wonderfully clean lines for Photoshop. At this point, you can export this image and open it in Photoshop or copy and paste back to Photoshop.
I pasted mine back to Photoshop. When I hit Paste, a menu pops up. I like to choose the Pixels option.
.png)
Because Illustrator traced the white as well as the black, my traced image retains a white background. Tracing the white gave me a better level of detail so it was worth the trade-off. I usually set my lines to Multiply anyway (as I did here) so it really doesn't matter.
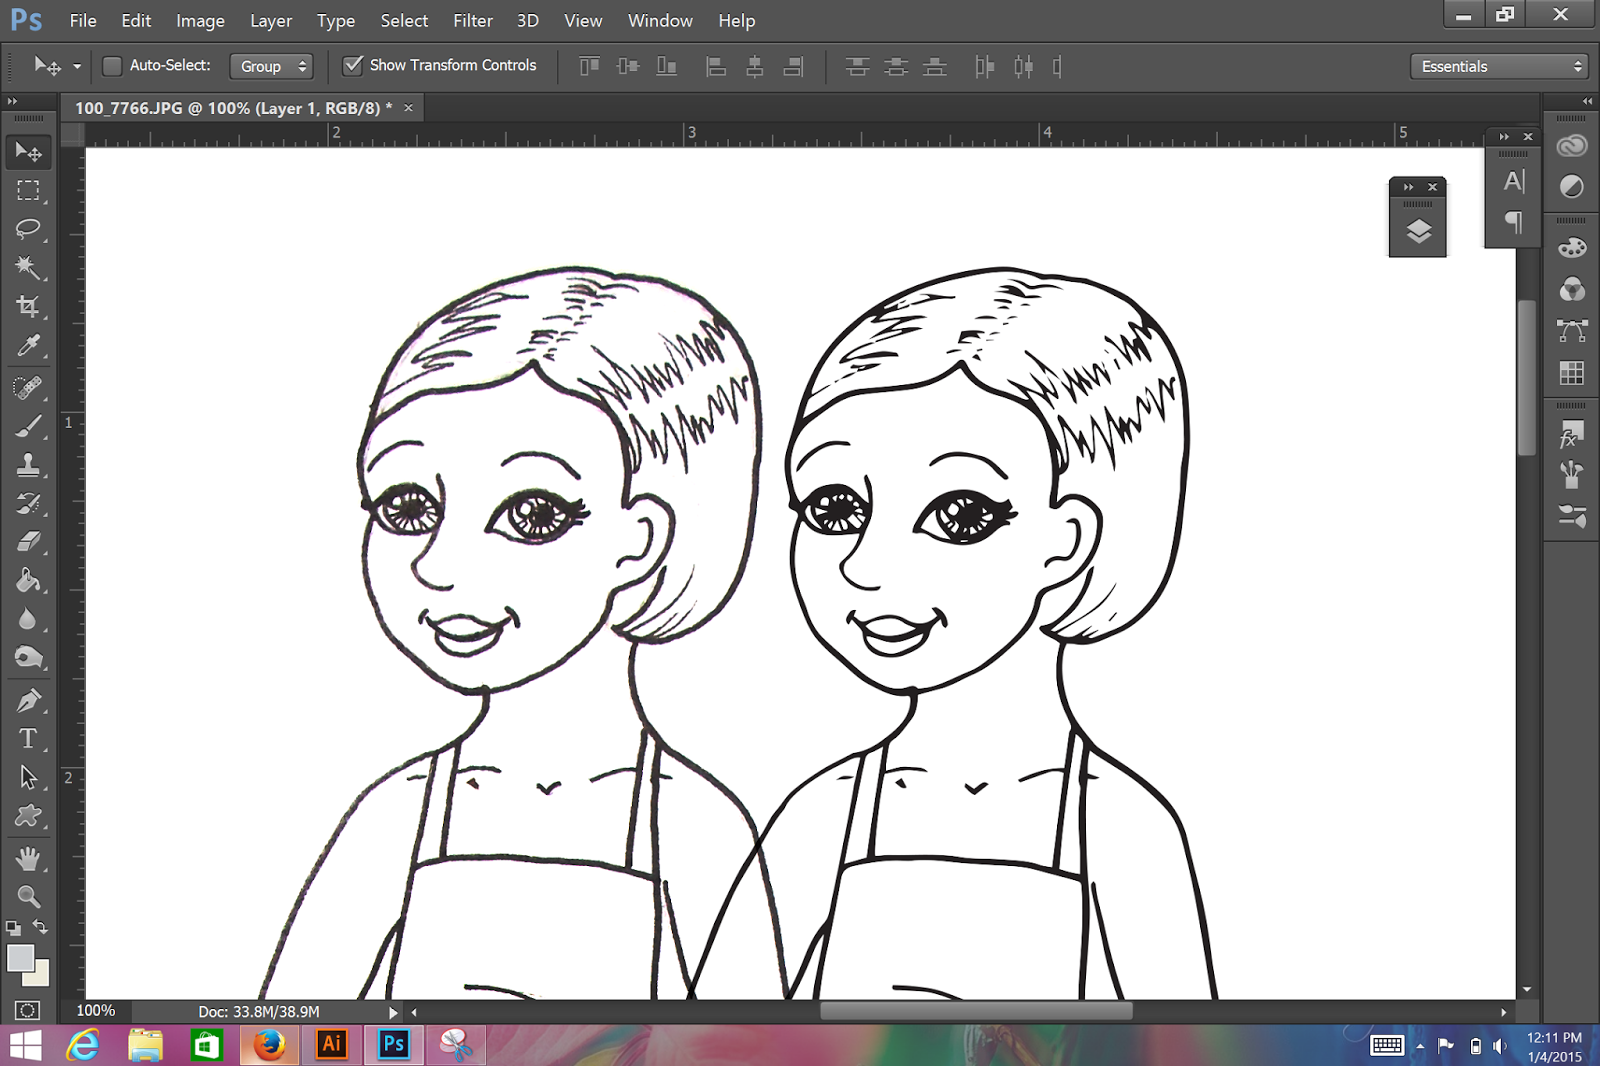
On the left is the cleaned-up version of the line art from Photoshop. On the right, the auto traced version. It's very smooth compared to the Photoshop version. I might trace and paste back & forth several times before I get the results I want. Even then, I may edit the lines in Photoshop to get them exactly the way I want them.
This technique words best for simple drawings and paper dolls or illustrations that use black (or single color) lines. In my example, the eyes and hair were really a bit too complicated for this method but I went with it anyway.
Hopefully this is a good introduction to Illustrator's robust auto trace function. Any questions, feel free to ask!
No comments:
Post a Comment